Enable CS 2 Custom Servers
CS 2 Custom Servers are available for organizers using a Community Space!
To do this, either go to this page or click the Upgrade button in Space Settings.
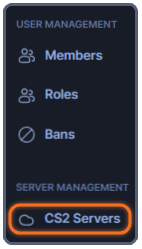 After upgrading your Space, you can set up and configure your custom server if you go to the Settings of your Space, and scroll down to the bottom of the left-side menu.
Add Server
![]()
Click the Add Server button to start the process of adding your server, once you do - you'll be asked to fill out all the required information for your CS 2 Custom Server.
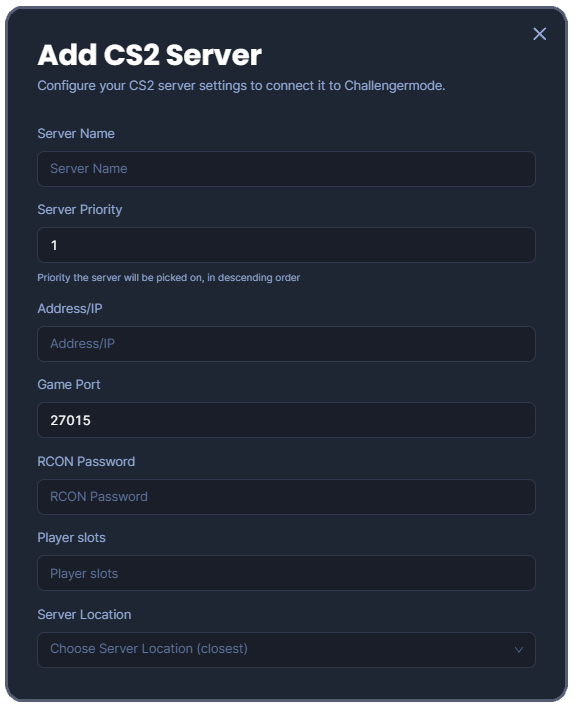
Configure your CS 2 server settings in order to connect it to Challengermode, make sure all the information you fill in on Challengermode is correct and matches the information in your server.cfg.
In order to set an RCON Password in your config, use the command rcon_password "yourpassword" in your server.cfg.
Make sure all necessary ports are open/forwarded as well.
GOTV & FTP
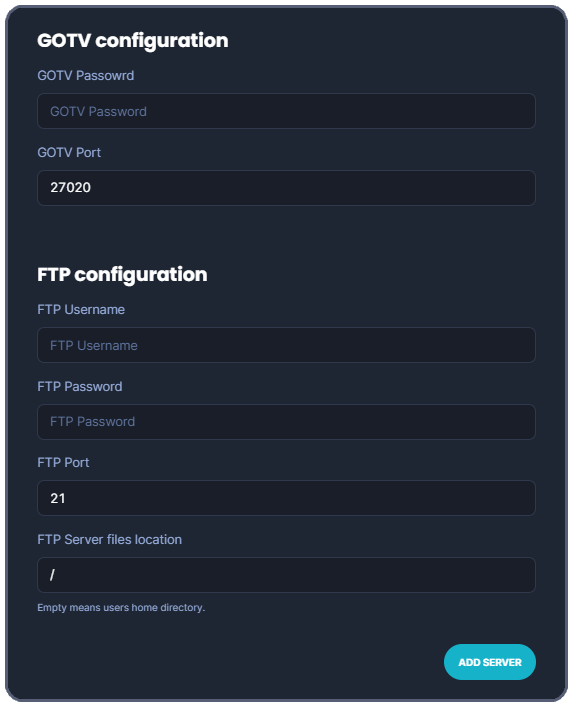.png)
It's important that you enter the correct Server files location for your server to be set up and behave as intended.
It is recommended that you create a new FTP user for Challengermode, that only has read/write permission in the CS folder.
The FTP root directory (Config folder location) should be configured as the game/csgo/ directory of the CS2 server. When you have done this, there should be a directory in the FTP root called cfg containing a file called server.cfg and others.
And again, make sure any necessary ports are open/forwarded for your FTP as well.
Server Config file
One of the benefits with running your own server, is that you can configure it to suit your needs perfectly.
However, if you want to use the same config that we run on our CS 2 server - you can find the .cfg file available to download right here.
Use your Custom Server in a tournament
Now that you're all set up, you need to opt in to use the Custom Server in your tournament as well.
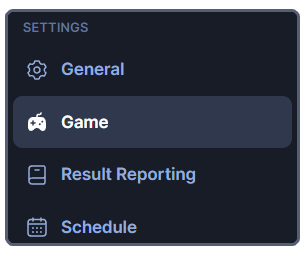
Go to your tournament, and go to Tournament Settings. Once there, go to the Game options under the Settings section.
Once there, scroll down and you'll find a section with the title Custom Server Pool. Here, you can find a drop-down menu, where your Space now should be available. Click the Space in the drop-down menu, and your server(s) will be used in the tournament.
Make sure you're taking the following in regard when running your tournaments
- The server needs to be available for Challengermode, make sure all necessary ports are open/forwarded.
- Challengermode needs read/write permission for the Server Files location folder on your FTP.
- You have to make sure your server is up and running when you try to use it in any tournament.
As always, it's good to test things before you go live with it - so set up a test tournament, turn on the server and give it a go before your actual tournament kicks off!
Running into other issues, or do you have additional questions? Feel free to chat with us by clicking (?) on Challengermode.
